Pneumatic Tool Owner's Manual
View Printable PDF - Pneumatic Tool Owner's Manual
Ver PDF Imprimible - Manual de Herramientas Neumaticas
Guide to Pneumatic Hammers
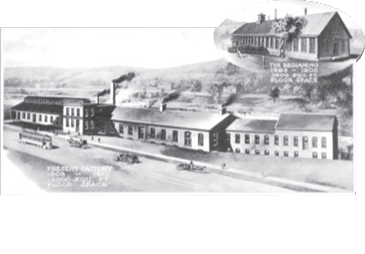
As inventors of the first pneumatic stone carving tool in 1890, we have had many years to perfect these tools and expand our range of sizes to suit the needs of all our customers. Whether you’re working in small blocks of alabaster or large blocks of granite, we want you to have the tool that best fits your work. If you feel the tool you have received is not a comfortable size or appropriate for your application, we will gladly exchange it for another.
Each Trow & Holden pneumatic tool is stamped with a distinct serial number so it can be registered in the buyer’s name. While our tools are guaranteed for life against breakage and defect, they may need to be sent in for service or repair occasionally. Unique details for each batch of hammers are also kept on file, so we can determine its exact specifications before beginning work.
Because these tools have only one movable part, they are difficult to wear out. We know of tools nearly 100 years old that are still in use. You make a great investment when you purchase a Trow & Holden Pneumatic Hammer!
Breaking in Your Pneumatic Hammer
Trow & Holden Pneumatic Hammers are made to very precise specifications. The piston fits the cylinder with a .0002” tolerance (2/10ths of 1/1000th of an inch!) so that the tool will perform consistently and not wear out for a very long time. For that reason, it may take 100 or more hours of use before achieving its maximum power level. We believe this slight reduction in power during early use will not significantly affect the tool’s efficiency. If a problem arises, please contact us for service.
Pneumatic Tool Safety
A common-sense approach to safety should be used while using any Trow & Holden stoneworking tool. Our Air Tool Safety Set is available on our web site at trowandholden.com.
Safety Glasses
To protect yourself from flying stone chips, always wear safety glasses — whether you are using hand tools or pneumatics. The best are those that completely cover your eyes.
Respirator
You may find that you are generating more stone dust with your pneumatic hammer. We suggest either installing a dust collection system or wearing a respirator.
Earplugs
Wearing earplugs during the operation of your pneumatic hammer is recommended.
Anti-vibration Gloves
Wrist supports may help prevent wrist strain, and shock-absorbing gloves may help reduce joint fatigue caused by vibration.
Strain and fatigue lead to accidents, so equipment that helps prevent these two conditions will improve safety. Taking breaks and changing hand positions frequently while working will also help prevent fatigue.
Pneumatic Tool Operation
Carving with a Trow & Holden Pneumatic Hammer and chisel is a two-handed operation, much as it is with a hand hammer and chisel. Because the nose opening of your hammer is round and does not have a retainer to lock a chisel into it, you will need to keep one hand on your air hammer and the other on the stock of your chisel.
There are a number of advantages to this design. It increases the comfort of the person using the tool by allowing him or her to change hand position during work without resistance from the tool. It also improves accuracy in fine work by rendering the chisels adjustable both in position and power during use. You can also discontinue power to your chisel instantly by simply withdrawing it from the nose opening, without disconnecting your pneumatic tool or turning off your compressed air supply.
Never allow your air hammer to run for extended periods of time without a chisel inserted in the tool (e.g., do not leave your hammer running on the table while you continue to work with another tool).
There are several ways to adjust the striking impact of your tool. You can withdraw the chisel from the hammer very slightly, until a suitable level of impact is achieved. You can also reduce or increase the air volume as needed using your hose-mounted air stopcock. Or, you can partially block off the exhaust outlet on your tool, using your thumb or finger, allowing some — but not all — of the air to escape.
There should be no more than two methods of air control within your air delivery system. The first control will be an air pressure regulator located on the compressor. The second will be an in-line valve (e.g. stopcock) used to control the air flow that powers your pneumatic tool. Additional in-line accessories or controls will only reduce the total amount of air available to your tool. Set the air regulator to achieve maximum power to the tool (do not exceed the air pressure rating of the compressor or air hose), then adjust the tool’s speed using the stopcock. Experiment to discover what degree of impact feels best to you. This will vary depending on the width of your chisel, hardness of your stone, and your application.
General Maintenance & Care
Your Trow & Holden Pneumatic Hammer requires very little maintenance to run well. With proper oiling, your tool should run well for many years. To help prevent excessive wear, follow these best practices:
Oiling & Other Maintenance
- The most important maintenance practice is to oil your tool before and after each use, and every two hours while in use. Detach your air hammer from your air hose. Place two drops of oil directly in the air inlet (where the tool attaches to the air hose).
Never use household oils in your Pneumatic Hammer, as they can quickly gum up the works and rob your air hammer of power. Using the wrong oil or failing to adequately oil a tool are the primary causes of poor tool performance. Use a light spindle oil that will not collect particulate and clog your air hammer. A sample of AIRLUBE® 10W/NR is included with your air hammer. You may order more from us directly ($8 per pint), or ask for a comparable product at a local hardware/ auto parts store. Even oil approved for other pneumatic tools may be too heavy for use in your Trow & Holden Pneumatic Hammer — if in doubt, give us a call. - Avoid using Teflon or similar types of thread-sealing tapes. Fragments from these tapes will seriously clog your air hammer.
- Use good air. Your Pneumatic Hammer requires a good, clean supply of compressed air in order to operate at peak efficiency. The intake filter on your compressor should be cleaned regularly according to the manufacturer’s directions. The air storage tank should be drained frequently to eliminate any moisture from the air supply.
- Always use quality air hose components and check for deterioration frequently. Make sure your air supply hose is in good condition. Pieces of rubber or fiber could enter the air inlet, causing the air hammer to lose power or stop working completely.
- Maintain optimal performance by cleaning. If your Pneumatic Hammer begins to show signs of reduced power or stops working completely, this usually is a result of fine particulate or heavy, dirty oil building up within the internal workings of the air hammer. Cleaning should not require disassembling the tool; simply disconnect the air supply and totally immerse the air hammer in an oil-reducing solvent such as kerosene or naphtha. Let the Pneumatic Hammer soak for several hours, then remove and let excess solvent drain completely from the tool. Put several drops of AIRLUBE® in the air inlet (see oiling instructions above), reconnect to the air supply and start the Pneumatic Hammer.
If this cleaning procedure does not improve the performance of the air hammer, please contact us. We will do our best to help you over the phone and, if necessary, make arrangements to have the Pneumatic Hammer sent in for repair at your convenience. - Store the Pneumatic Hammer carefully. Use a lightly oiled cloth to wipe the outside surfaces clean after using your air hammer. If possible, store it wrapped in a clean, lightly oiled cloth as well. This will help keep moisture out of your air hammer during storage, and keep the internal components of your tool free of oxidation.
- Avoid running the Pneumatic Hammer without a chisel in place. Running without a chisel can cause burrs and excessive internal wear.
- Avoid leveraging on your Pneumatic Hammer when carving. This will create excessive wear on the shanks of your pneumatic chisels and the nose bushing of your air hammer.
- If your Pneumatic Hammer does not run at all when air pressure is applied, remove the chisel and, with the air still on, tap the nose end of the tool gently on a non-marring surface such as a block of wood. This should start the tool immediately and generally indicates that the tool is not getting enough lubrication. Try oiling more frequently.
Additional Service
Under normal usage, there are only two components of your Pneumatic Hammer that will wear out — the piston (the only moving part in this tool) and the nose bushing. If your air hammer ever wears enough to need servicing, you will know by the excessive leakage of air around the nose end of the hammer or irregularity in the movement of the piston.
If it appears to be time to send in your Pneumatic Hammer for repair, please send in the whole tool. Do not attempt to disassemble your tool unless instructed to do so. Your air hammer was manufactured to very exact specifications, and attempting to open it without the proper equipment can damage additional components of your air hammer.
We generally replace the nose bushing and piston at the same time, thereby duplicating the fit and performance of a new tool. Replacement of the piston and nose bushing due to normal wear are not covered under warranty; contact Trow & Holden directly for service estimates and to coordinate returning a tool for repair.
Compressed Air
You will need a source of compressed air to power your air hammer. Air compressors come in a wide variety of specifications and power sources. There are a few important factors to keep in mind when searching for a configuration that is suitable for powering your Trow & Holden Pneumatic Hammer(s).
Air Pressure & Flow
All Trow & Holden Pneumatic Hammers require an in-line air pressure of 90–110 psi. This is a fairly standard level of pressure for most compressors, at which there will be a corresponding CFM rating (rate of air flow in cubic feet per minute). Trow & Holden Pneumatic Hammers are designed to run at a range of pressures and air flow rates; this is what allows the tool to perform smoothly at variable speeds. Connecting an air hammer to an air supply that is above or below the specification required for that particular tool will not damage the tool. However, an insufficient air supply will limit your ability to operate the hammer at maximum power. The specifications provided for each hammer should be considered minimum requirements for operating that hammer to its fullest capacity.
Air Storage Capacity
Unlike more common pneumatic tools, Trow & Holden air hammers run on a steady stream of air. This makes a compressor’s air storage capacity a very important consideration. Generally, a 20 gallon air tank is considered a minimum capacity. While compressors with smaller tanks may be necessary for portability, this will require a motor strong enough to quickly and frequently refill the air tank(s).
Power Supply & Motor
Consider the placement of your compressor. Gas motors will generally produce more power, but will not be suitable for use indoors. Compressors with electric motors may have limited output, and should be considered carefully to ensure they will produce a sufficient air supply. When possible, choose a compressor with a two-stage pump configuration. These compressors are generally much better at keeping up with the air consumption of high-demand pneumatic tools.
For more information regarding air compressor selection, please refer to our Air Compressor Buying Guide.
View PDF - Guide to Air Compressors
Ver PDF - Guia de Compresores de Aire


